
Ted DeCagna was recently given the task of shooting a 45 room mansion in a suburb of Philadelphia to record all construction work under progress. The existing house was redesigned and some major construction issues arose and the careful documentation of each and every room was requested by the owner with 3-5 photos of each room to make sure every possible irregularity was documented.
So how did I plan and shoot such a massive building? First, I calculated I would need about ten minutes per room on average to set up a tripod or 8-9 hours of shooting in total. I planned this shoot over 2 days including an overnight stay at a local motel to ease the degree of difficulty of such a challenge and make sure I was not exhausted and razor sharp for all photos. This was a very good plan as I finished the shoot comfortably and very efficiently in 9 hours over 2 days.
I used my 18-70 millimeter lens and wide angle 12-24 millimeter for most rooms to capture the maximum possible image area. I used my tripod (optional when there is enough light) I say tripos optional as in most cases with the great new Nikon mirrorless cameras with an ISO setting of 1600 and using Shutter Priority mode and a Nikon flash on TTL, a tripod is not needed. You will not get blur, however to set up each room perfectly level shots of many of the large rooms and when shooting some low light situations in the house under construction I chose to use High Dynamic Range to capture the extreme contrast situations.
I chose to you High Dynamic Range to capture the extreme contrast situations I came across and realizing I’m asking the camera for a triple exposure in High Dynamic Range I did not want to risk blur so I used my tripod for most shots.
Now with that said, closets and narrow rooms require a vertical shot and are not fast to rotate on a tripod so I did hand hold those shots and my trick to insure zero blur in buildings under construction is to use a 2X4 as a brace. Since the entire house was in the framing stage it was fairly easy to find a 2X4 that was in the right spot to let me capture each and every room with zero blur. I bracketed my exposures with Shutter Priority mode and Aperture Priority mode when there was a depth of field distance concern, and I dial up or down using exposure compensation after viewing my shot photos in my camera preview window.
I think the camera preview window is the greatest advancement in camera technology in the past 30 years as nothing could be better than viewing your exposure choice results one quarter second after shooting to make sure you have a perfect exposure.
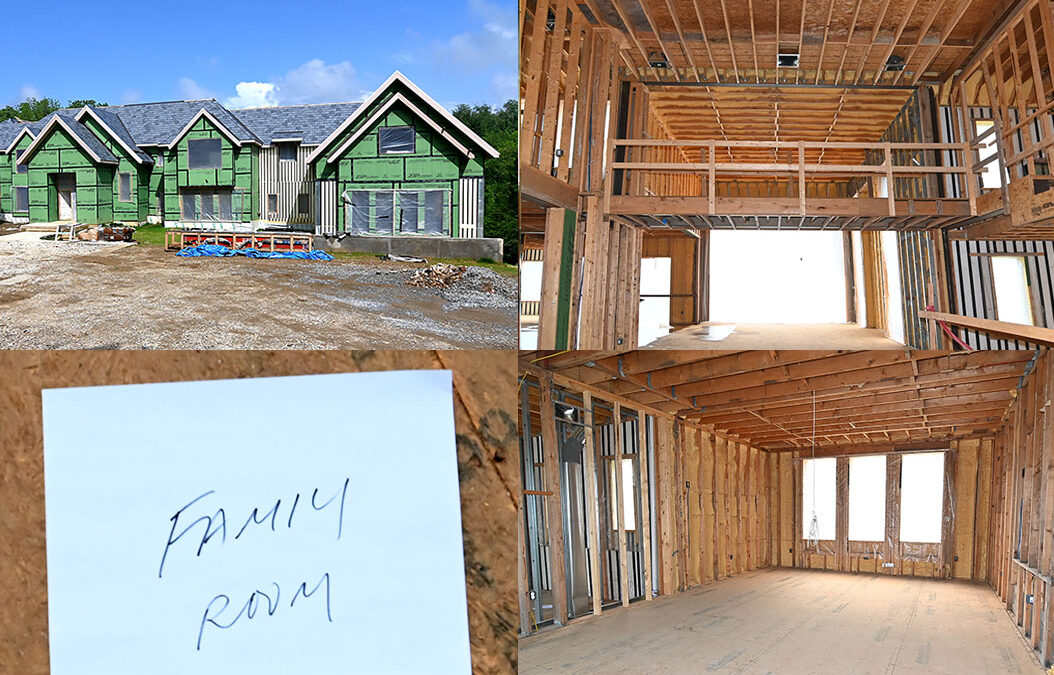
I was also required to label each and every room in post editing with the room name exactly as the blue prints had each room named. This can be very challenging in a 45 room house when many rooms look very similar, closets look identical and many large rooms could easily be named anything. So I did a very careful walk though of the entire house and made simple copy paper signs that I hand wrote for each room “ Family Room” Laundry Room” “Pool Lounge” “Basement Mechanical Room 1” “Master Bedroom 2nd floor” etc. I then shoot a photo of each hand sign I have placed on the floor before shooting my batch of bracketed photos for each room. When editing as long as you go through all exposures slowly this floor labeling method will insure you have every room labeled correctly. This way I know I have the exact room as indicated on the blue prints and I also kept the accurate sequence of walking through the house.
I also did a walk around the entire property and shot the massive back yard patio and infinity pool from many angles using both wide Angle and 50 millimeter lens. I used my 300 millimeter zoom lens to best capture close up architectural details of the roofs and a projecting triangular deck on the first floor, shot from a second floor window. This gave me some very dynamic architectural shots and insured I captured every square inch of the property. I shot about 1,100 exposures in total in about nine hours over two days and needed about 4 hours for the post production editing, labeling and fine tuning a few exposures. But all the time spent bracketing on the job site gave at least 1-3 mostly perfect exposures so very little post adjustment exposure was necessary.
So all my careful planning and meticulous, slow documentation shooting enabled me to deliver over 280 perfect photos. The client was delighted with my results so the whole shoot was a major success. So when you have a need for a construction photographer in Philadelphia area or New Jersey construction photographer or New York construction photographer, look not further than Ted DeCagna Photography, Cranford, New Jersey.
Recent Comments